The food plot craze has caught on in the whitetail hunting community in a big way. It seems as if almost everyone that hunts deer is also planting food plots … or at least they want to plant food plots!
Most deer hunters are not farmers and thus lack even a basic understanding of the steps it takes to “grow a crop”. That’s fine as most of today’s successful food plotters were also green beginners not too long ago. If you happen to be one of those deer hunters that want to plant food plots on your hunting grounds but aren’t sure how to get started, here is a step-by-step guide to help you.
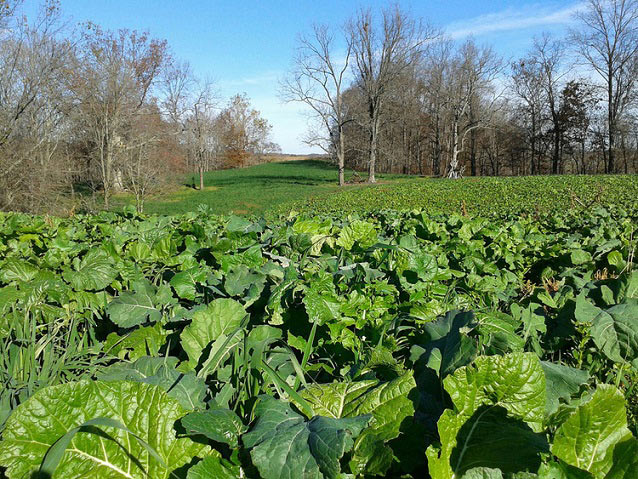
Choosing a good location for your plot should be the first order of business. In order for your “crop” to realize its maximum potential, it will need as many hours of sunlight as possible. Trying to grow a plot under the canopy of trees is a recipe for failure. To be successful your plot needs to be in an open area such as the opening of woods or along a field edge. The site should also be fairly level and accessible with whatever equipment you have to “farm” your plot.
Speaking of equipment, this will likely be the limiting factor regarding the size of your plot. I firmly believe that “bigger is better” when it comes to plots but again, your equipment will dictate the size of your plot. Some serious food plotters have large tractors with multiple implements but many plots have been planted with hand tools such as shovels and rakes. A lot of plots are also planted with ATVs and small lawn tractors. Don’t get discouraged because you lack the high-dollar equipment that some food-plotter have access to. Many big bucks have been shot in small food plots.
Once you have decided on the location and size of your plot, it is time to get started. There is no better insurance for a successful plot than a soil test. These tests cost less than $20 and will tell you the exact fertilizer requirements needed for your plot. Without a soil test, fertilizing is nothing more than a blind guessing game.

To take a soil sample to submit for testing simply dig down a couple of inches and get a small handful of soil and deposit it in a small container such as a bucket. Do this in several locations within the plot, mixing the soil from each collection with the others. This will give you an average soil profile of your plot. When you submit the sample you will only need about a cup of mixed soil.
Your food plot site will likely have some sort of vegetation growing in it which will need to be dealt with. Do not make the mistake of thinking you can just work up the soil and kill the vegetation that is growing in the plot. Grasses and some weeds have very resilient root systems that will sprout new growth and compete with your crop for water and nutrients. Spraying the vegetation with a herbicide such as a glyphosate is your best bet. Glyphosate is a non-restricted herbicide that will kill weeds and grasses, including their roots. A small handheld sprayer will work well for applying herbicide on smaller plots or if you do not have access to a larger tank sprayer.
After you have sprayed your future plot you will need to wait a couple of weeks for the weeds and grasses to die before working the soil. This is a good time to do some research and purchase your seed. Keep in mind that some seeds such as soybeans are planted only in the spring, others such as turnips are planted in the fall, and some such as clover can be planted in either spring or fall. If you plant the seed you have chosen at the wrong time, the results won’t be good.
I would strongly encourage you to not get caught up in fancy packaging, celebrity endorsements, or advertising campaigns when selecting the seed for your plot. Instead, learn to read the seed tags which are required by law to be on all seed products. Look at things like germination rates, percentage of inert matter, etc to see exactly what it is you are buying. You may think you are buying 10# of seed but once you subtract the inert matter and figure in poor germination rates you could literally be getting less than half of that.
When you are deciding on which plant species to grow in your plots you really should consider what equipment you have available to work your plot. Small seeds such as clover, turnips, sugar beets, etc will not need to be planted very deep and can sometimes even be just broadcast on top of the ground. Larger seeds such as soybeans and corn will require the soil to be worked well and be planted 1-2” deep. This is fine if you have the equipment to do it but someone limited to a garden rake would be better off planting a smaller seed.
When it comes time to actually plant the seed, the success of your plot will largely depend on what you do that day. After this point, everything is out of your hands and up to the weather and Mother Nature.
If your soil test shows that you need to apply lime or fertilizer to your plot, now is the time to do it using either a hand-held spreader or a larger one. For small plots, you can buy your lime and fertilizer in bags at many farm and home stores.
Working the soil can be done with a number of tools from garden rakes to large disks pulled by tractors or specialty implements designed to be pulled with ATVs. Whatever tool you have to work the soil, make sure that you end up with a seed bed that is not too rough or cloddy and is free of large clumps of dead weeds or other debris.
The actual planting can be done in a number of ways. Broadcast spreaders are great for a lot of the seeds and blends used on food plots. After the seed has been spread you will then need to either roll the plot or lightly disk or drag it, depending on what seed species you planted. For larger seeds such as soybeans, lightly disk the ground to cover most of the seed. Be careful not to bury the seed too deep. Most of the time it is better for the seed to be too shallow than too deep. Smaller seeds like clover can simply be rolled into the ground with a cultipacker or even a lawn roller. If neither option is available you can still get a good stand if weather conditions are right. If you lack a way to roll your seed into the soil after planting it is a good idea to plant at a slightly increased seeding rate.
There you have it, a short course in planting a wildlife food plot that should get you started down the right path. You will likely find that planting food plots and improving wildlife habitat becomes as addicting as hunting itself, and just as our hunting skills improve with time and experience, so too will our food plot knowledge and success. Good luck! To learn even more insider food plotting tips check out the incredibly detailed training videos here at the Whitetail Master Academy.